
Extended Routes
Introduction: What are Extended routes
Extended routes is introduced as a replacement to our old Route system. This new system makes it easier to manage the wide variety of routes within Routty and enables routing of documents based on their content.
Routes determine where documents should be processed, so at least one route must be configured before you can start processing documents in Routty.
Quick Start: Getting started with Extended routes
Prerequisites
Before creating an Extended Route, ensure you have:
A valid Tenant in Routty
A completed Connector Configuration
Any Custom Mappings required for the route
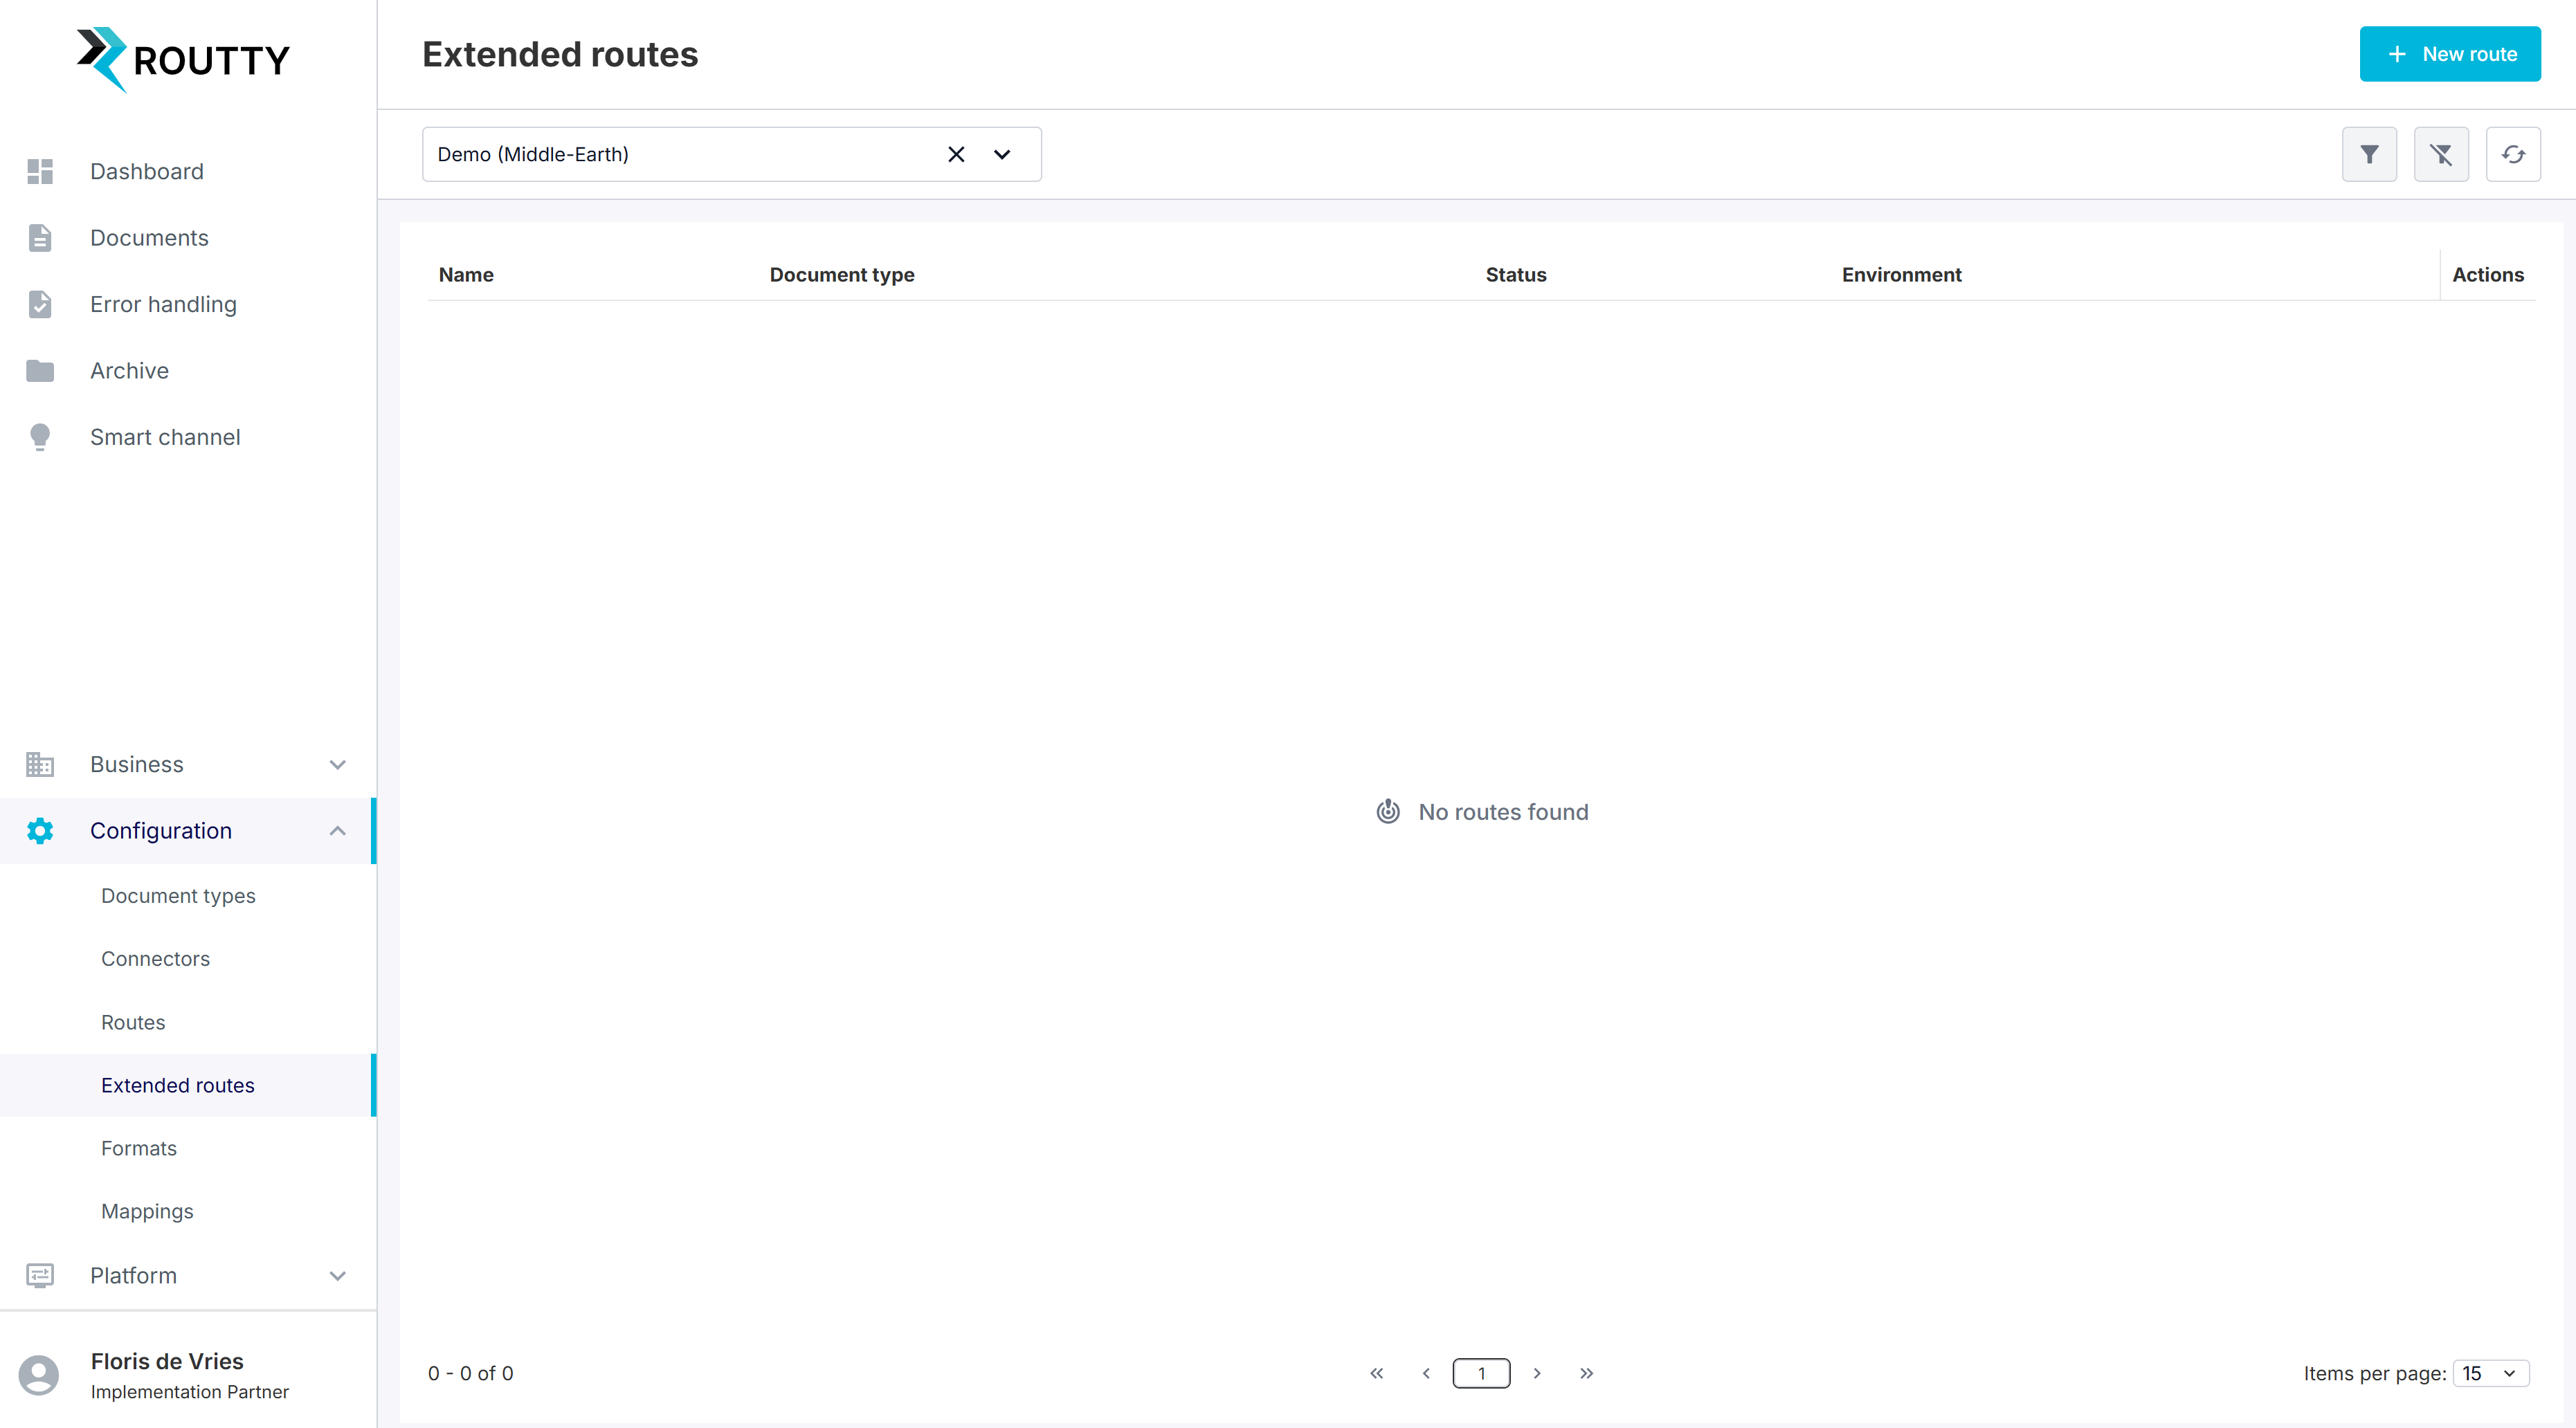
Step 1: Creating a route
Navigate to Configuration > Extended Routes and click New Route to create your first Extended Route.
Step 2: Fill in basic info
A new screen will open with Route Settings that must be filled in before saving the route.
Fill in the following info:
Name: How will you find your route back later?
Note: Make sure to think of a naming convention that best reflects the use case of this route.
Example:
TST-APinv(Test Environment, AP invoices)
Status: Will this route be active during route determination?
Test: Does this route apply to TST or PRD documents.
Only one Extended Route can be active for the unique combination of:
Tenant
Test/Not-test
Document Type

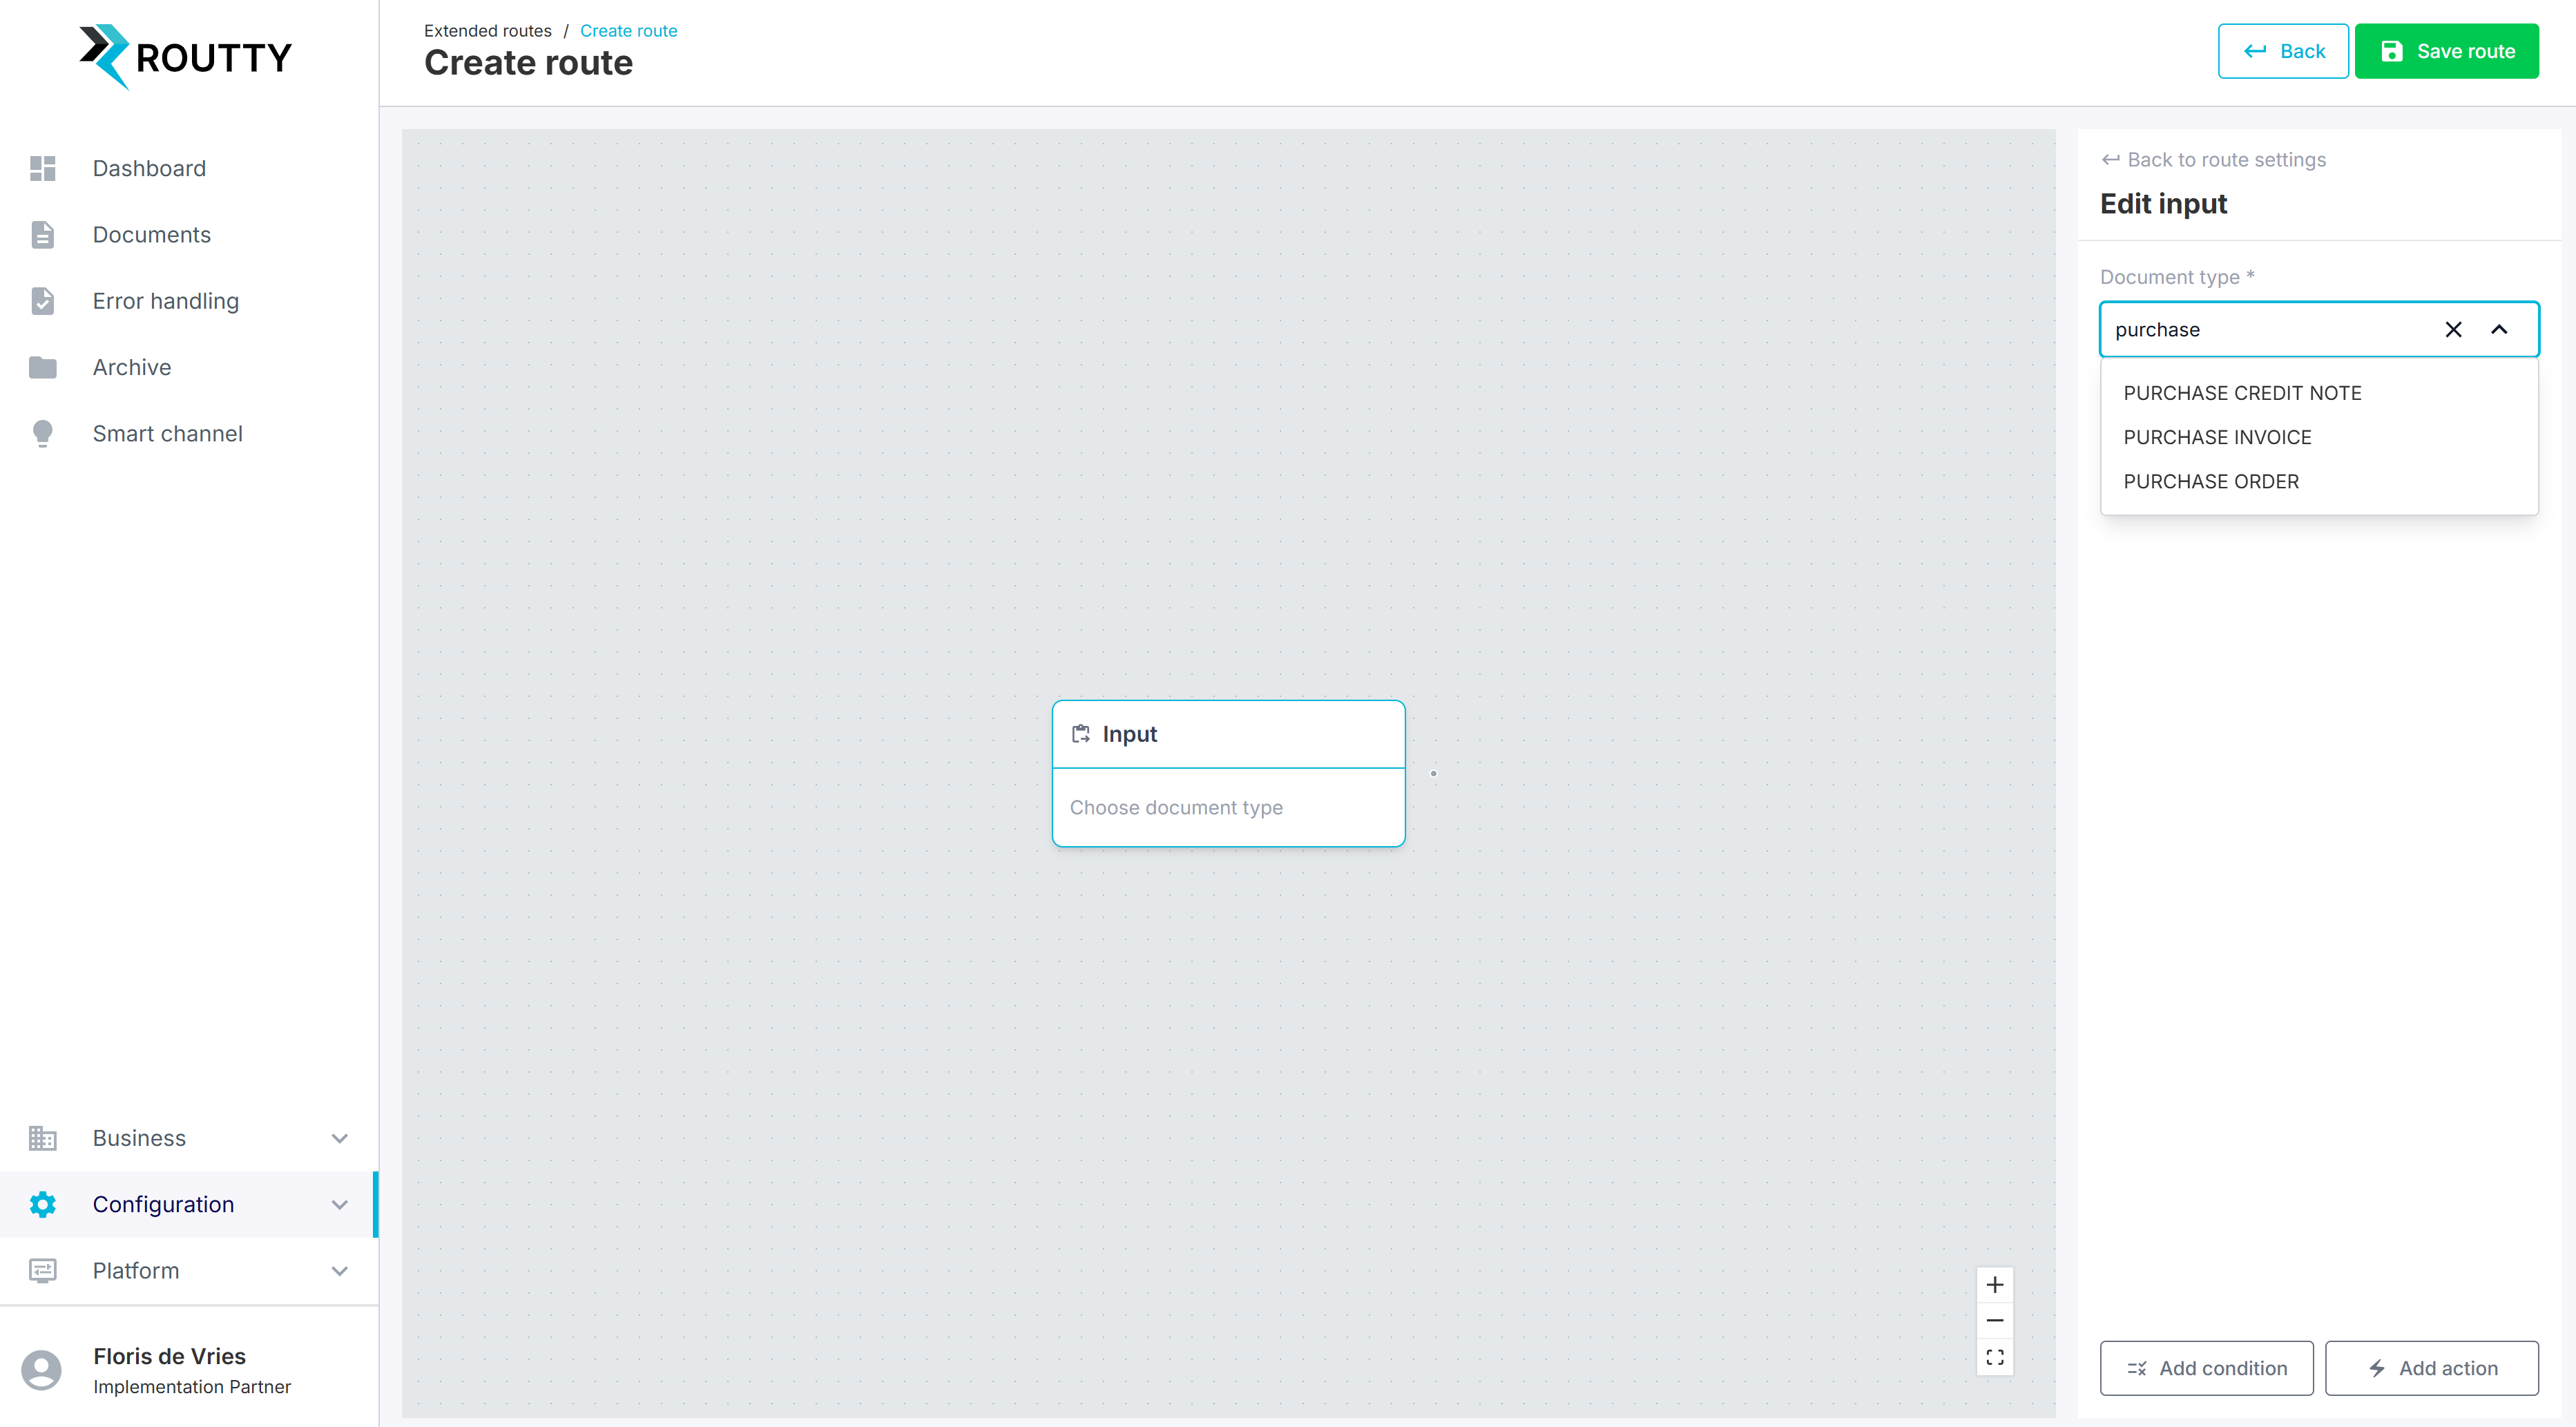
Step 3: Configure input node
Each Extended Route’s primary entry point is defined by the input node. This sets the Document Type that qualifies for this Extended Route.
Each route must have exactly 1 input node.
From this entry point, each individual route is built in the form of a tree/graph of
nodes. It is the combination of these individual nodes that will clearly show the actions you want to execute to the document that qualifies for this route.
Actions:
Select the Input node by clicking on it.
Selecting the node enables the Edit input panel on the right of your screen.
Please select the Document Type this extended route applies to.
In this case, we select Purchase Invoice, as we are setting up an AP invoice process as the example in this case.
You can select a node either by clicking on the node inside the Graph view, or you can select the node from “Nodes list”, displayed on the right side of your screen (when no node has been selected).
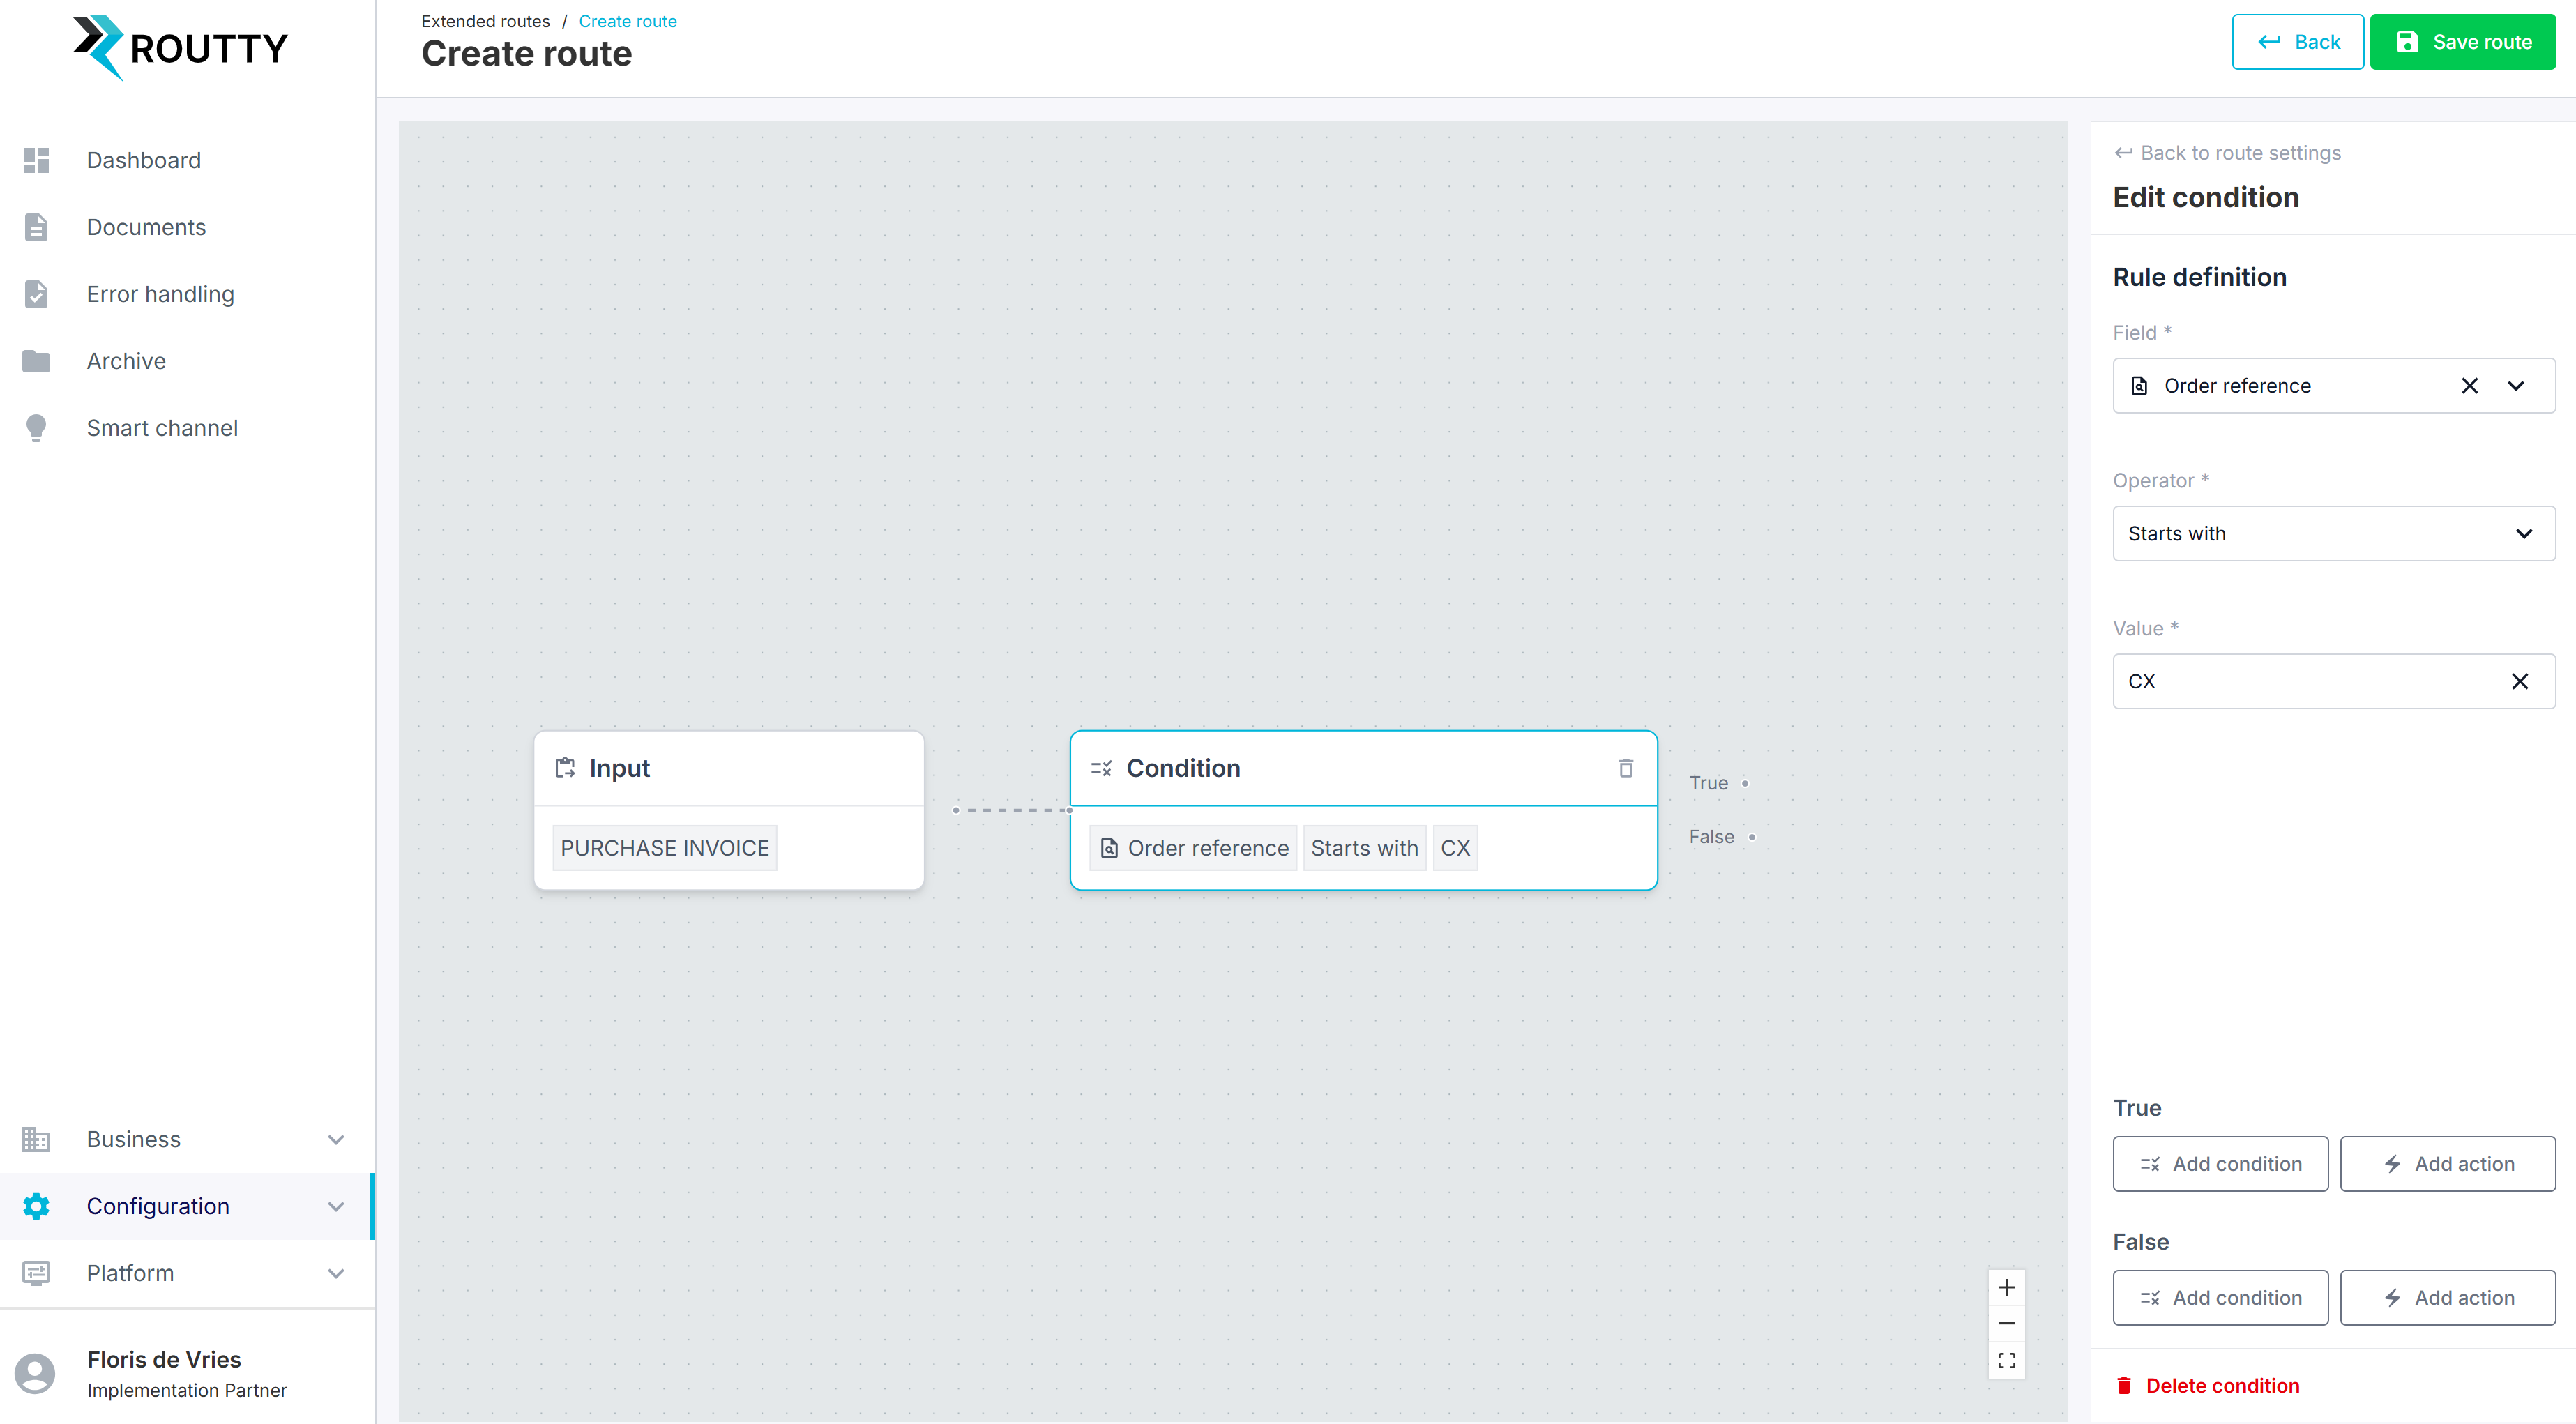
Step 4: Configure condition node(s)
Condition nodes allow you to branch documents into different processing paths.
A route may contain 0 to 150 condition nodes.
Continuing the example:
Your AP invoices must be split between two ERPs.
ERP1 receives invoices whose Order Reference starts with CX
ERP2 receives all others
Actions:
Add a new Condition Node (via the right-hand panel or by clicking the blue + symbol)
Fill in the node details:
Field: The document field to evaluate
Operator: The comparison logic
Value: The value to search for
A condition evaluates to one of two outcomes:
True – The condition is met
False – The condition is not met
Each outcome must be connected to another node.
Creating a new node can also be done directly from within the graph view:
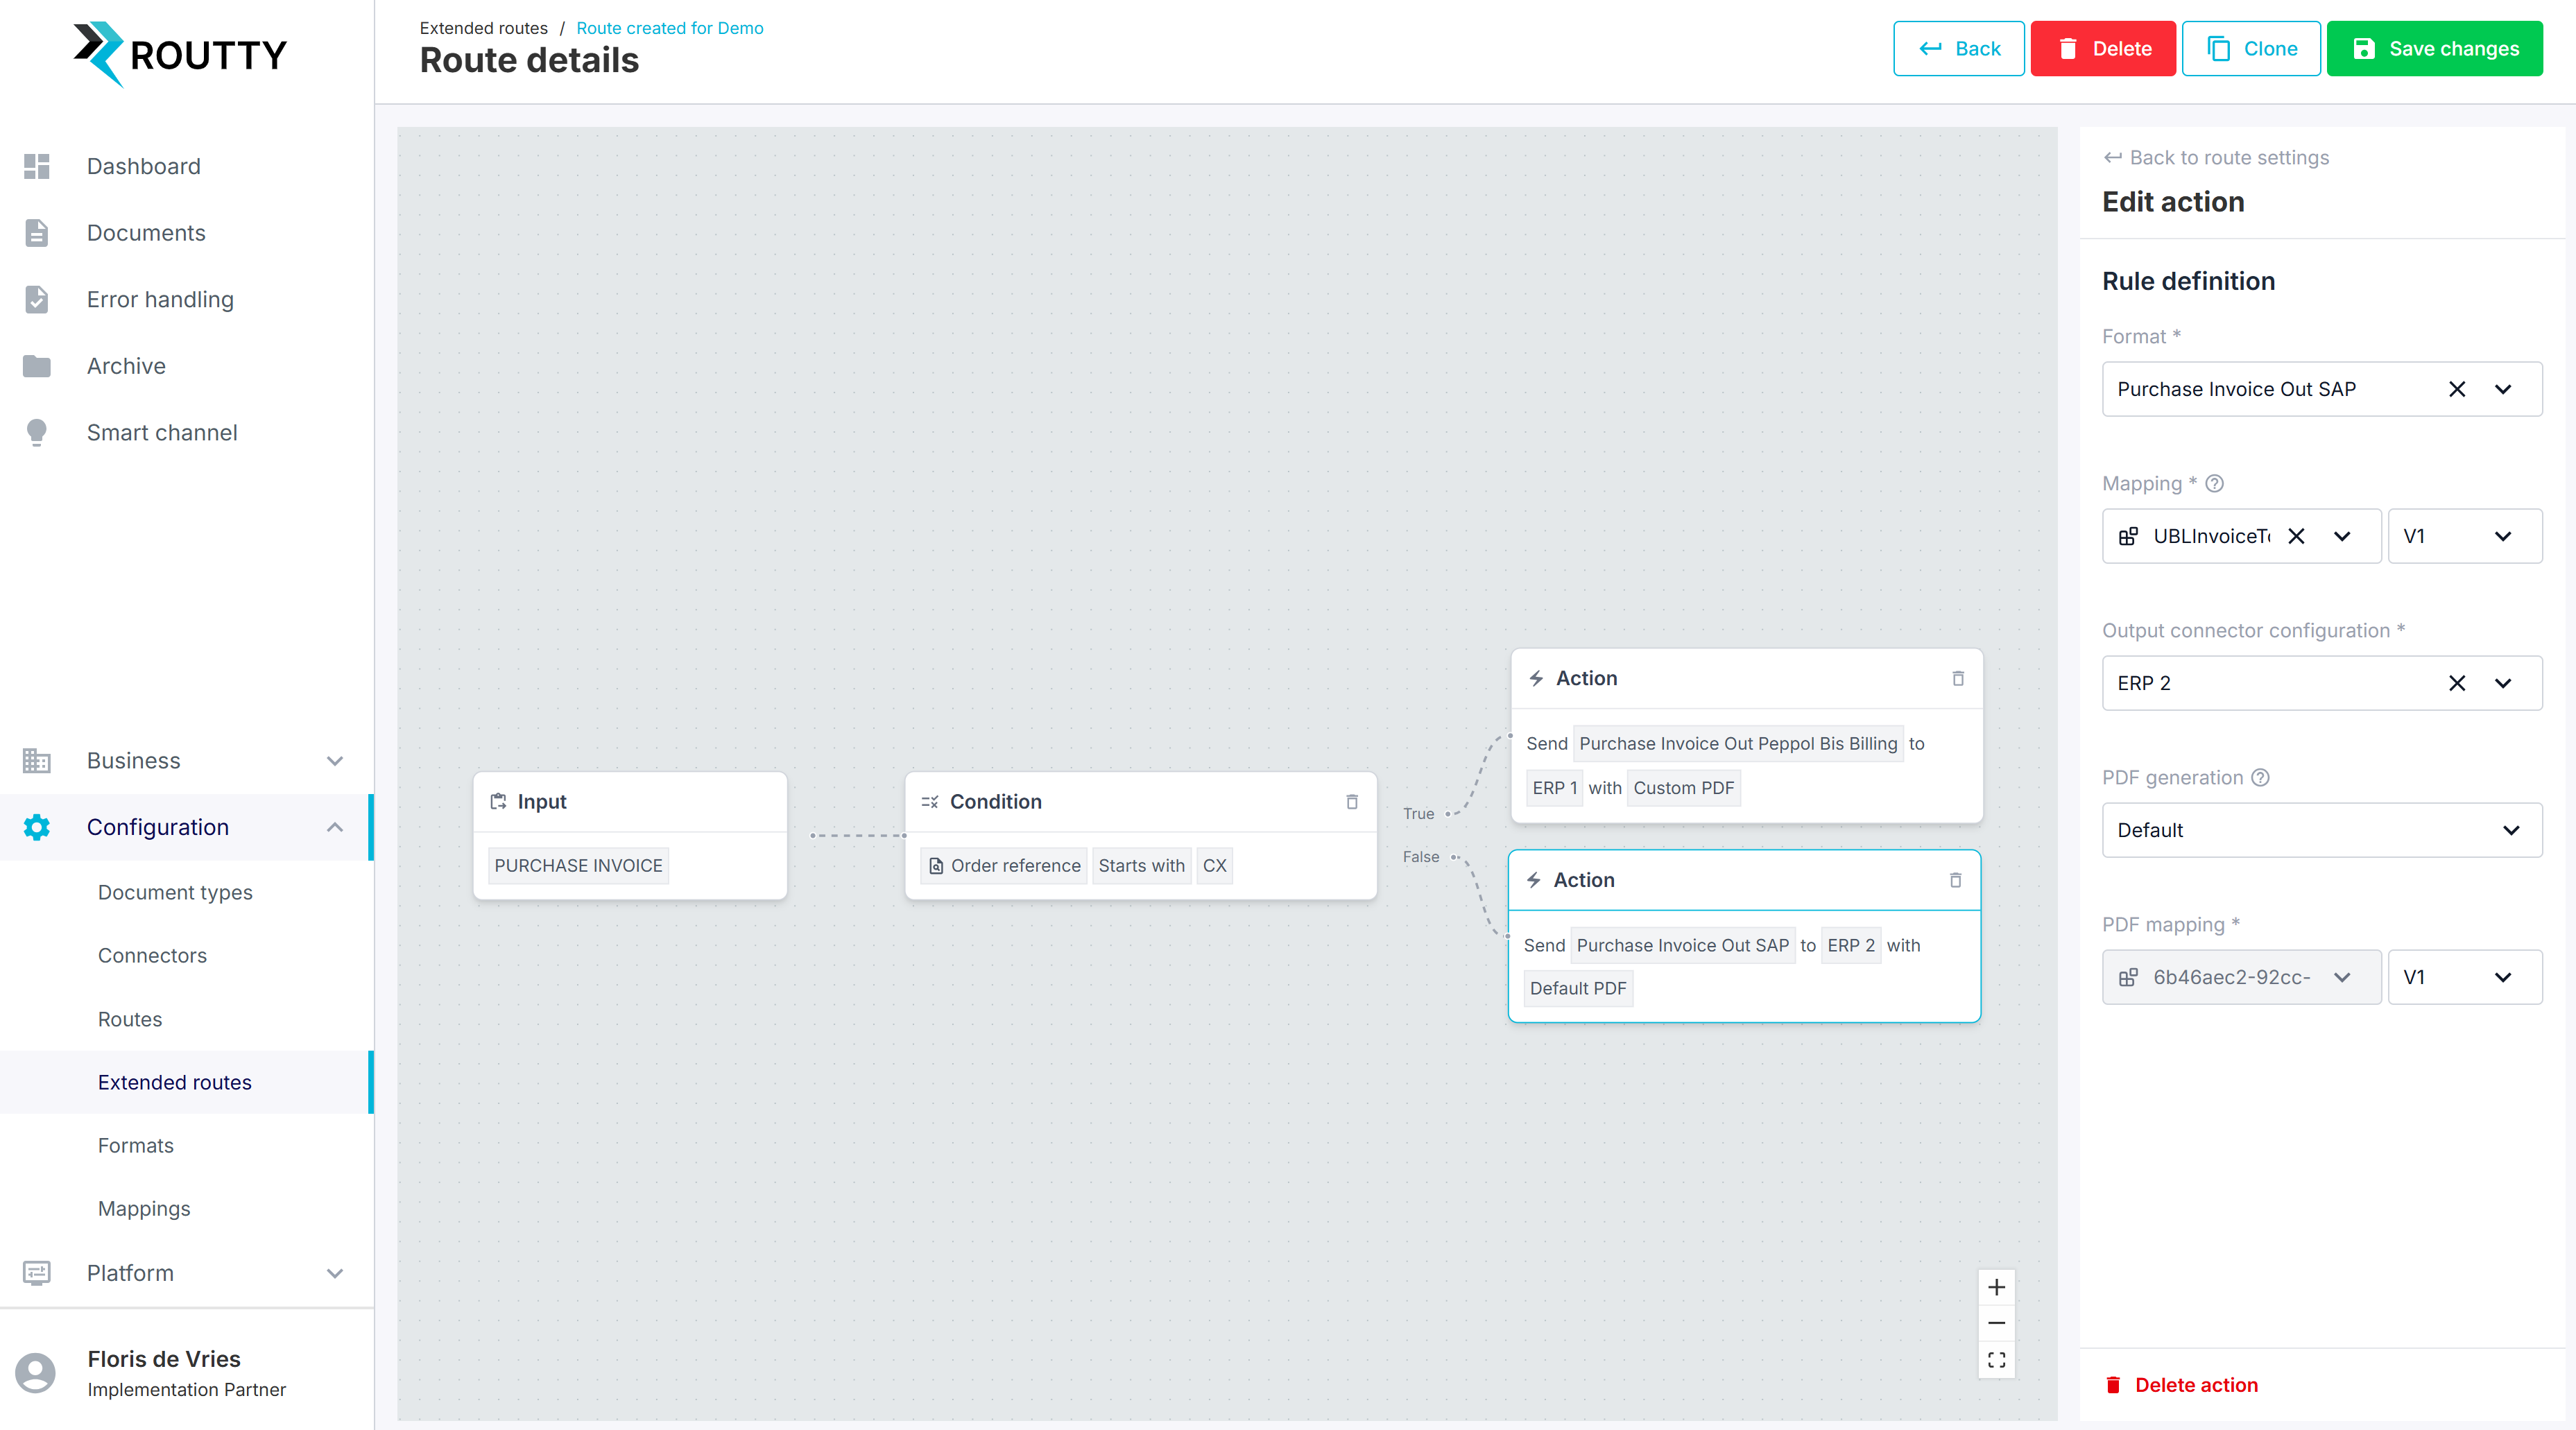
Step 5: Configure action node(s)
Action nodes determine where and how your document will be sent.
Each route must have at least one action node; they are always end nodes.
From our above example, we need to link our two ERPs based on the True- or False-path of our Condition Node. Linking to the ERP is done by creating an Action Node for each of the outcomes of the Condition Node.
Actions:
Create Action nodes:
True: In our example, to send the document to ERP 1
These are the documents where the value “CX” is the “starting value” in the field “Order Reference”.
False: In our example, to send the document to ERP 2
These are the documents where the field “Order Reference” “does not start” with “CX”.
Fill in the following details:
Format: Expected inbound format of the target system
Mapping: The mapping (and version) to use
Connector Configuration: The connector used to send the document
PDF Generation: Here you can indicate which visual document generator has your preference.
Press Save Changes
Congratulations!! You have now created your first route!!
If your route has only one action node, a condition node is not required.
You can simply define:
Input Node → Action Node
Components of Extended routes
This section will give more details and context of the different components used by the Extended routes
Input Node
Each Extended Route’s entry point is defined by the Input node. This defines the Document Type that is in scope for this Extended Route.
Each route must have exactly 1 input node.
An input node leads to either a condition node or an action node.
There can only be 1 Active Extended Route based on the combination of:
Document type (Input Node)
Tenant (Route Settings)
Environment (Route Settings).
For example for Purchase Invoice in the demo tenant, only one active PRD route is allowed and only one active TST route.
Condition Node
Condition nodes are used in a route to choose between the different action nodes in a route.
Each route can have 0 - 150 condition nodes.
Each node contains:
Field
Options include:
Metadata: Channel Name, Document Reference or Routing Identifier
Document attributes: Order Reference, Accounting Cost
This is the most dynamic field, since it’s defined based on different attributes for each document type.
To inspect what values are available and from where they are extracted take a look at the Document Type via: Configuration > Document types > [Your document type] > Attributes
Company data: Group ID, Name, Number
Business partner data: Name, Number
Operator
The Operator value drives how the content of the Value-field is searched for in the designated Field. The following options are available:
Equals
Does not equal
Contains
Does not contain
Starts with
Does not start with
Ends with
Does not end with
Regex
The operators works in the same way as the provided example case:
Field-Operator-ValueOrder Reference (Field) Contains (Operator) CX (Value)
Value
A plain text string to be used by the operator.
Regex is also a valid Operator option, in this case fill in your regex expression in plain text in the Value.
To construct a valid regex validate it first using a website such as: https://regex101.com . Or ask your favourite LLM to assist!
Condition connections
The Condition node has two output connection paths. They are the possible outcomes of the created conditions, the can be either True or False for each processed document.
The True path must always connect to another node.
An condition node leads to either another condition node or an action node.
Action Node
Action nodes determine where and how your document will be sent.
Each route can have 1 or many action nodes.
In your Extended Route design, an Action node is your end node. They do not have any subsequent node or nodes attached to them.
Each action node is defined by the following:
Format
Defines the output document format sent to the target system.
Mapping
The definition of the mappings that are available to you, is driven by the content of the enriched.xml file.
The mapping can be set to a specific version of the default mapping or to a custom mapping.
When selecting a mapping, you must select a version of the mapping. By default the latest version will be selected during creation of a route. New versions are not automatically applied to existing routes.
Output connector configuration
To send your document to the correct destination, you must select a connector with a preset configuration that matches your destination’s expectations. Only connectors supporting the selected format will appear in this list.
PDF generation
Allows you to decide how your PDF is generated.
Options:
Default: PDF generation is determined by document type.
Custom: An override mapping is selected to customize the PDF.
Disabled: No PDF is generated.
Note on legacy Routes and “Extended routes”
With the 25.3 release of Routty Cloud the old way of creating routes has become deprecated. This means that they can no longer be edited and or created.
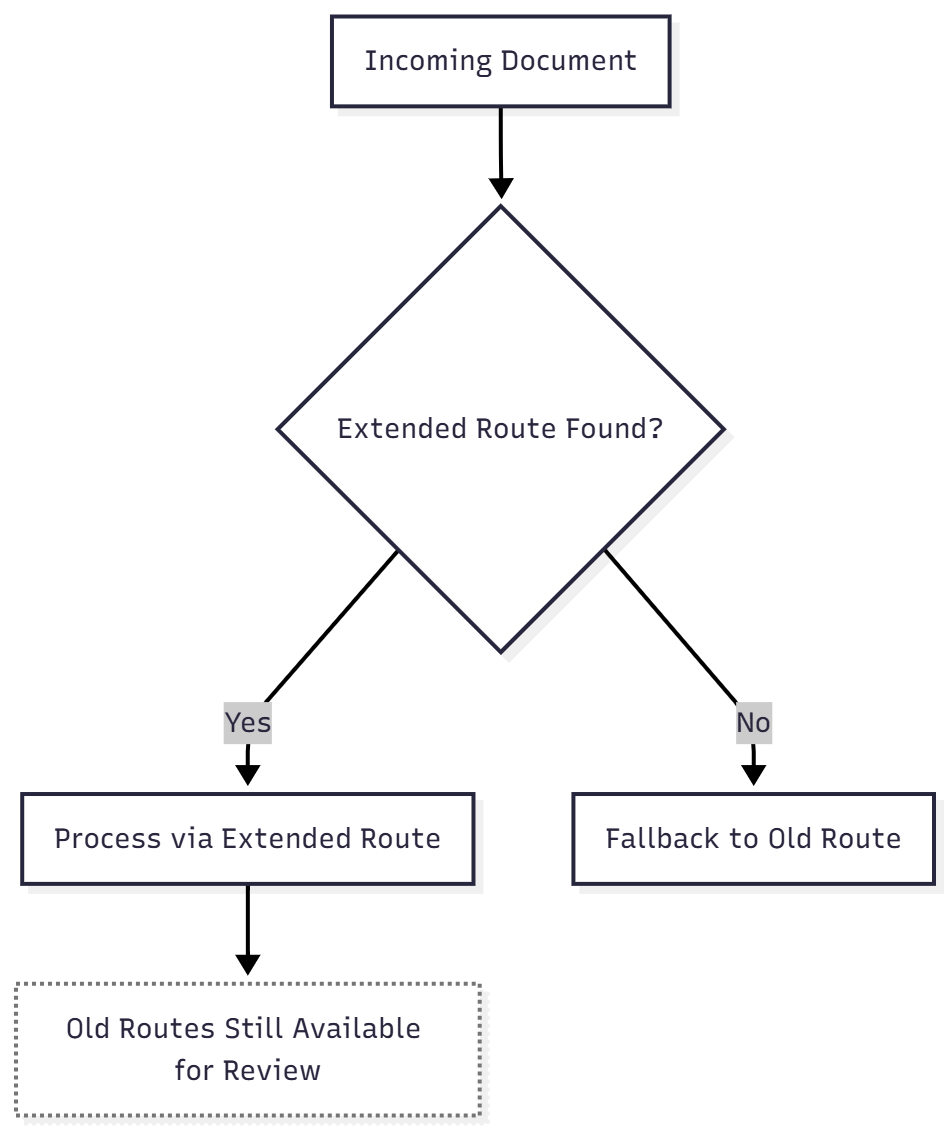
To ensure continuity for existing customers:
Legacy routes are automatically migrated to Extended Routes
Legacy routes remain available for review
They serve as a fallback when no Extended Route exists
In the 26.2 release:
Legacy routes will be removed
“Extended Routes” will be renamed to “Routes”